Next details. Gas mask cannisters, boots, other equiment, wooden weapon parts with some brown, entrenching tools handles in a light wood (yes, you can see them!) then weapon barrels and the MGs using a mixture of black with dark grey. I don't like pure black as too harsh for me.
Finally faces and hands. I used a Vallejo dark flesh, and I was careful not to splodge it around too much. Faces are a problem, just a little quick dab to avoid spreading paint over chest and shoulders which is the commonest error. In this case better too little than too much. Hands are easier, you only need a little dab over the gun.
After these were finished time to paint the helmets, carefully not to go over the face, but of course overpainting any excess face over the helmet .
At the end I painted the individual figures base stubs they come with with the colour I intend to use as undercolour for the bases, in this case a dark umber, and finally a final coat of very diluted wash, and they're ready for basing.
Some random notes:
These H&R figures come in strips of about 10 per strip, and you have the choice of cutting them up as individual figures or you can leave them all together. I like to spread them apart to have wider brush space.
Remember you are not painting individual figures, you're painting armies and you have to use a mass technique. Of course you can come around later and give your command figures a little more detail if you want.
A thing I forgot was that Panzerschrecke, heavy MG tripods and the mortar barrel and legs were painted German Dark Yellow before the final dark wash.
Also before basing I still want to give gun barrels a light drybrush with Gun Metal, and machine gun ammo belts will have a suggestion of Brass.
Those wooden strips are in this case a 2m length of 10x5mm strips I bought in a DIY shop for €2, which I sawed into 20cm lengths so I have a nice supply now.
A good idea is always to have various strips in several stages of finish so if one group is drying or curing you can work in another group.
Now back to work. I cut another number of 25mm sq. bases for my first Pz Grenadier battalion, and one 30mm sq. for the Batt. HQ.
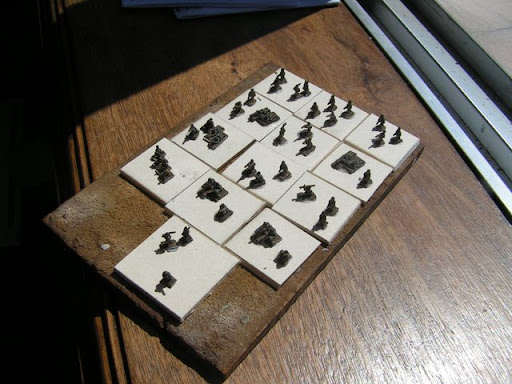
With the tanks what I did was coat the base with PVA glue and cover them in sand, painted and drybrushed, and glued the vehicles on the almost complete bases. With the infantry I did the opposite. As the figures themselves have their small stands, if I stuck them on the prepared bases they'd look like they were floating over the texture, so I glued them to the bases and applied the glue & sand afterwards.

What I did was to apply the glue with the bottle nozzle directly on the base surface taking care to avoid smearing the little figures, and working bald spots in with a toothpick. Then into a tub with sand the bases went, one by one as each had the glue applied. Next steps will be painting / drybrushing.
So here they are in their entire miniature glory. I used two grades of 'vegetation', the second one somewhat fluffier. With all this greenery they look like 'maquisards'

The vehicle in the HQ stand here is provisional only, it hasn't undergone the Full Monty treatment yet.

I had used two grades of sand, and within the coarser sand bag I was lucky to find this small rounded pebble with a flat face which was just perfect to be uses 'as is' for a rock outcrop

Now that I have 2 Pz battalions and 1 inf battalion it's time to turn to the Soviets. Will come back later!
By Miguel Morão
MM: e a foto do gato, carago?
ResponderEliminar